
How Would You Like To...
How Would You Like To...
Improve The Speed And Efficiency of your entire Photoshop Workflow
Improve The Speed And Efficiency of your entire Photoshop Workflow
AND make your images look better than ever
without spending Any more time than necessary in front of the computer
What if you could...
CREATE CLEANER, MORE PRECISE SELECTIONS AND MASKS...
... so you can accurately edit separate parts of a photo (like shadows and highlights) selectively, without affecting other parts and without having to become an expert at the advanced lengthy techniques this usually requires?
And just how useful would it be for you if...
Luminosity Masking JUST became faster and easier to learn and use
so you can now get the full benefits of the technique without having to go through all the tedious manual processes that are confusing and easy to forget if you don't use them all the time?
Imagine feeling proud to display your photos
because you KNOW you're getting the best out of your RAW files
and editing them to a high impact professional standard
Here's the good News...
I'm about to share with you...
How to create the best, professional looking, striking and attractive landscape photos in Photoshop without spending longer than you want to learn and use the lengthy and tedious advanced techniques this would normally require.
(This is your secret weapon to bulldozing through the confusing and time consuming processes that are usually required to create outstanding images in Photoshop)
The #1 Counter-productive thing you must STOP doing if you want to get great results, fast...
My step-by-step process to consistently high-quality landscapes that have the WOW factor….
Can you imagine never having to worry again
about spending hours Processing an image
only to find you’re not happy with the result?
or No Longer having to avoid all the Difficult-To-Learn Photoshop techniques
That you know you should be using
What would that do for your photography?
Now before moving forward, it’s key that you pay really close attention to what I’m going to share with you on this page.
It could mean the difference between truly taking your photography to the next level or continuing to spend more time than you really want in front of the computer, only to create results you’re not happy with ...
... Because I’m going to be giving you some essential ingredients here that you’ll be able to put into action right away.
So Let's Begin...
Perhaps you feel like you’ve tried it all, when it comes to developing a fast and efficient workflow and for one reason or another, you’re just not producing the best looking landscapes you know you’re capable of.
You’ve likely been disappointed that no matter how much you try to figure out the advanced techniques you know are important, it always seems to be too complicated.
Well, I’m going to share with you the tested and proven system I have developed to create the best looking landscapes with Impact in Photoshop, whilst making the whole step by step process faster and easier than ever.
The truth is…
I wasn’t always a Photoshop expert...
In fact, the first time I started using photoshop to process my own photos, I failed miserably and couldn’t seem to piece together any of the random tips and techniques I was learning into something that actually helped me.
Despite what some people think, I haven’t always been able to create great images.
I wasn’t born a natural “creative person”
After investing in my first camera and using it for a while, I couldn’t understand why everyone else’s photos seemed to have so much vibrance and flair and mine just fell flat.
Despite knowing what I know now, I can understand how frustrating it might be to produce photos that just don’t live up to the beauty of the scene you witnessed when you clicked the shutter.
Luckily for me, through a lot of trial and error over the years, I’ve developed a set of techniques and strategies that will bring even the most dull, flat and boring RAW files to life.
This is the system I’ve used to create consistently eye-catching photos while retaining complete and predictable control over how they turn out.
And now this is the system that I’ve condensed into a process that makes it infinitely easier to use for even the most beginner level photoshop users.
Picture in your mind…
You bring up a RAW file in photoshop and you know with confidence that you have all the tools and techniques under your belt - a system - to turn it into a finished image that your friends, family and photographer buddies will truly admire and will wish they’d taken themselves!
First, Here's A Little Bit Of Insider Information...
Typically, this is the root cause of the issues you face today.
If you’re reading this, it’s likely because you’ve been at this a while and you’re determined to finally get the best out of your images.
But like many of my students, you've been previously conditioned to believe that you have to be some kind of computer whiz-kid to be able to use the advanced Photoshop techniques the pro's use nowadays...
Or you’ve been made to feel like you’re getting into the game too late to learn these newfangled processes that seem too complicated.
However, this couldn’t be further from the truth...
Sure, it’s great for the photographers out there already getting the results you want to be getting and who keep a tight grip on their secrets because they want you to give up before you try, before you realise how easy it can be.
However this belief absolutely crushing for someone like you who is actually trying to reach their true potential as a photographer.
So do not accept this horrible belief that you can’t reach these heights with your photography…
If you do, you'll more than likely continue to be left unfulfilled by your photography.
Luckily, as of right now you won’t fall victim to this any longer and by refusing to believe the best results in Photoshop are too difficult and time-consuming to achieve, you’ll be that much closer to creating photographs you’re truly proud of.
How amazing it would be...
...to have access to the exact strategies, tips, and tactics that would virtually ensure your success, and ultimately give you the ability to churn out massively improved photos every single time
quicker and more efficiently than ever before?
This is exactly what I’ve done for myself...
It's what I’ve done for clients...
And it is what I can do for you
This is what I’ve done for myself...
this is what I’ve done for clients...
And this is what I can do for you
As promised, I want to share some of my strategies with you today.
Strategies that will improve your entire Photoshop workflow and have you knocking out portfolio quality images faster than you ever thought possible...
STRATEGY #1
Stop Processing Your Images "Willy Nilly" In Photoshop
You must stop processing your images willy nilly.
In other words, you can't continue to process your images without a plan from the start.
You need to start using a structured workflow that can produce consistent results every time you work through it.
Because only when you have a repeatable structure in place will you be able to pinpoint the parts that need improving the most and then be able to see the direct results when you tinker with the techniques.
You can’t change 10 things at once and expect to know which of those 10 things was responsible for an image turning out better or worse than the last.
You’ll just end up wasting even more time in Photoshop later trying to recreate past successes but not knowing exactly how you did it before.
Take my 6 Stage Workflow for example.
If you break everything you do in Photoshop down into its individual components and slot them into this framework, then it will give structure to your entire process.
Then you can tweak the individual techniques one at a time at each stage to test their impact on the overall outcome.
Here’s a quick overview of the 6 stage workflow so you can think about how what you’re doing now fits into this “skeleton” structure.
Stage 1: Import & RAW File Preparation
This initial stage of the process involves the basic calibration and fixes to your RAW files before you load them into Photoshop (so, either in Lightroom or ACR). This covers things like camera profile calibration, white balance, lens distortion, noise reduction and so on.
Stage 2: Exposure Balancing
The main goal of stage 2 is to create an even exposure by recovering any under-exposed shadows and over-exposed highlights. If you're blending bracketed exposures, this is where you do it.
Stage 3: Colour Correction & Calibration
Here's where you set the tone for the colours in your image. Any colour corrections or adjustments (creative or natural) happen here at stage 3 of the workflow.
Stage 4: Add Contrast & Drama
Here's where we start making our images POP! It's also where most of the creativity happens in this process.
There are a million and one individual methods and techniques out there that you can use to meet the goals that are the purpose of stage 4, but whatever techniques you end up using, make sure you always keep this simple rule in mind:
Many subtle changes trump fewer big changes. Every. Single. Time.
Stage 5: Enhance & Embellish
When you reach this stage in the work ow then your image is probably around 90- 95% complete.
However, the extra 5-10% that you are about to do now is what's going to add 50% to the “finished-ness”.
Things like dodging and burning to make objects stand out more, adding micro and macro contrast adjustments, and making finishing touches like cleaning dust spots etc are all filed under stage 5.
Stage 6: RSE
Once your masterpiece is complete, you have just one more step before sharing it with the world...
Resize, Sharpen, and Export. In that order.
Just by taking this outline of a workflow and slotting into it all of the separate individual edit’s you’re already making when you process your landscapes, you’ll automatically create a high level of consistency to your images.
Remember: Consistency comes first.
Once you have consistency, then you can work on improving and tweaking little bits one by one to test their effects on the results.
STRATEGY #2
You need to FULLY incorporate luminosity masking into your workflow
Learning how to use luminosity masking quickly and effectively is the cornerstone of my own photoshop workflow and it’s ALWAYS the difference between top quality results and ho-hum efforts.
My Luminosity Masking Mastery course is my best selling course with over 3947 photographers having taken it so far at the time of publishing this page.
Now I will be honest with you… Luminosity Masking IS an advanced technique and it does take some dedication to truly master the manual way of using it.
The course has been an incredibly valuable resource for those who’ve used it to its fullest...
But the good news is that there is now an easier way to make full use of luminosity masking without having to worry about the time consuming and sometimes confusing manual techniques.
Stay tuned and I’ll tell you about that in just a minute.
First though, let me just show you some of the benefits of using luminosity masking in your workflow:
STRATEGY #3
If you want to be able to create a speedy and efficient workflow, you need to SIMPLIFY
You need to be able to take even the most complicated and cumbersome techniques, and run them through as quickly and efficiently as possible.
Otherwise you’ll spend longer than necessary processing each and every photo.
You need to be proficient and speedy when it comes to applying these advanced techniques that everyone else is using.
One way to do this is to become so well-practiced and fast at creating luminosity masks, that it becomes automatic and simple for you to perform these complicated processes, almost like muscle-memory.
You don’t have to think about how to make the precise selection you need, you just flip over to the channels panel and it instinctively just happens.
Alternatively, the act of simplifying might mean finding or creating your own set of Photoshop actions that take the steps you’re already doing in Photoshop, and making them happen in a couple of simple clicks.
Important: This does NOT mean use Automated Plugins to do your processing for you. They take away all control from your processing and generally provide “Pot Luck” results.
I’m talking about creating shortcuts for the things you already do (or are going to learn to do) in Photoshop.
Even advanced techniques like Luminosity Masking can be made easier and simpler without losing their effectiveness by consolidating many of the functions for selecting clean and accurate luminosity masks into a handful of actions or buttons.
Here's How Over 1600 Photographers have improved the speed and efficiency of their Entire processing workflow...
without Sacrificing Using the advanced masking techniques that are critical for
getting the best out of their RAW files in Photoshop
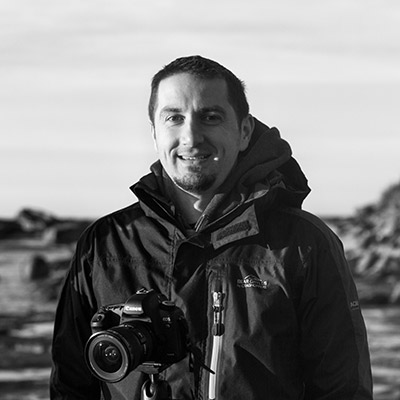
Hi!
I'm Steve Arnold and I’ve taught thousands of photographers around the world how to improve their Photoshop workflow and create stunning Landscape Photos.
I’m also the creator of the...
LUMINOSITY MASKING PANEL
FOR PHOTOSHOP
The ONLY Photoshop panel on the market that has been designed to make luminosity masking EASIER and FASTER whilst fitting in perfectly with a well thought out processing workflow at the same time.
The Panel makes the time consuming, complicated process of creating clean, precise luminosity masks as easy as just a few clicks of the mouse.
This system boils down the most advanced and convoluted photoshop techniques to being easy as pie for even beginner photoshop users to perform.
So, if you really want to:
Then you have FOUND what you're looking for!
The Luminosity Masking Panel has been tested and proven to work. If you’re looking to experience these results for yourself, then this is for you.
As you might imagine...
The Luminosity Masking Panel has been cleverly designed with you in mind…
And this revolutionary panel will work for you, EVEN IF:
The Luminosity Masking Panel may not be suitable for:
The Luminosity Masking Panel is a system that makes advanced Photoshop techniques fast and easy to learn and use.
This is the direct result of years of study and years of digging through the trenches to find what REALLY works, and them boiling all that down to a simple Panel to make the whole thing easy and fast for every level of Photoshop user.
Perhaps the very best thing about it is that it:
Photographers of all ages and all skill levels from countries around the world have used this panel to get great results:
John B
Luminosity Masking Panel User
I had tried to use a couple of other plugins, but they were just too complicated to use and didn't include the flexibility you've got in your plugin/extension. [The Panel] makes more efficient use of my time, [and gives me] better results.
Gene L
Luminosity Masking Panel User
[The Panel helps me] create better and more precise masks.
… Ease of use and the quality of the elements in the panel. They are not junk and the panel is so easy to use you don't need to spend hours going through training PDFs and Videos. What training there is, is to the point and professionally created.
Richard H
Luminosity Masking Panel User
The panel combines several steps in Photoshop into a single click or two. I am a naturalist much more than a photographer. I struggle with Photoshop so any simplification in the process is very helpful.
[With the Panel] I am less reluctant to edit my photo in Photoshop if I'm not happy with what Lightroom has done. I spend less time searching for what to do in Photoshop.
Derek E
Luminosity Masking Panel User
As a hobby photographer searching for excellence I was aware that luminosity masking was the way to go but need a boost to learn more and got it [from the Panel]. It is part of my everyday work flow now
Derek B
Luminosity Masking Panel User
[The Panel helps me] make precise selections in the areas of my images where I want to make any edits. It has helped to see specific areas where I want to select for editing and gives a better understanding of what I am trying to achieve with my edits. obviously the fast selections based on luminosity are a huge benefit, the added options for finishes, sharpening etc, all go to make the panel a great addition to my own workflow.
If you're looking for the easiest way to step up your Photoshop game...
Luminosity Masking Panel
is your answer…
Now, you may be thinking
- "I bet any System that can give me all of THAT would cost a small fortune"...
And, in all honesty? It really should.
Let me explain.
I’ve already helped countless photographers around the world, reach their goal over the years.
Now the luminosity masking panel makes that process even faster and easier.
The panel has been proven to work, and for good reason too.
It is the only Panel on the market that:
Think about this for a moment…
By simply using this system you could go from being confused and overwhelmed by all the advanced and complicated ways to produce great results in photoshop, to having a precise step-by-step framework and a Panel that makes easy all of the techniques that guarantee you the results you want without any luck or guesswork
You’ll start to produce better quality results without spending any more time than absolutely necessary in Photoshop
You’ll be able to shoot with confidence knowing that you’ll have what it takes to bring the best out of every shot in post.
Now, something that can give you this much clarity in Photoshop and gives you the key to unlocking the full potential of your photography could easily be worth $500
Wouldn’t you agree that discovering the secrets to producing the absolute best quality landscape images with ease and speed, would be well worth $800 or even $1000?
And heck, compared to the thousands and thousands of dollars some spend on new lenses, cameras, and all kinds of other equipment every year in the hope that it will be the magic pill that gives them the look and feel they’ve craved for so long, this is nothing.
(But don’t worry, you won’t pay anywhere near that price today.)
I invite you to take a closer look and see why everyone’s calling it their go-to resource.
For example, here’s a video showing how to perform the “simple” task of:
First, the lengthy manual way…
Then using the Panel…
You’ll be shocked how much manual work the panel takes away!
If you’re looking for the most efficient way to incorporate luminosity masking into your workflow, then you’ve probably already figured out that my Luminosity Masking Panel is not just “an” answer…
It Is THE Answer
The price of the Luminosity Masking Panel is Just $97
(Australian Dollars)
However, you won't be getting just that today...
Because I’d like to give you 3 special bonuses when you
take action right now
(and if you already own any of these bonuses, get in touch to arrange an alternative!)
FREE Bonus #1: Photoshop Workflow Fundamentals Video Course
You’re going to discover how to use the powerful 6 Stage Processing Workflow mentioned earlier, so you can finally gain consistency in your Photoshop results . This includes:
It’s normally valued at $27, but it’s yours FREE today!
FREE Bonus #2: Luminosity Masking Mastery Video Course
This is my flagship Photoshop course that has taught thousands of Photographers the ins and outs of Luminosity Masking in Photoshop.
Now the Panel makes luminosity masking easier than ever before, but if you DO want to dive a bit deeper into the technical side and gain a thorough understanding, then this is for you.
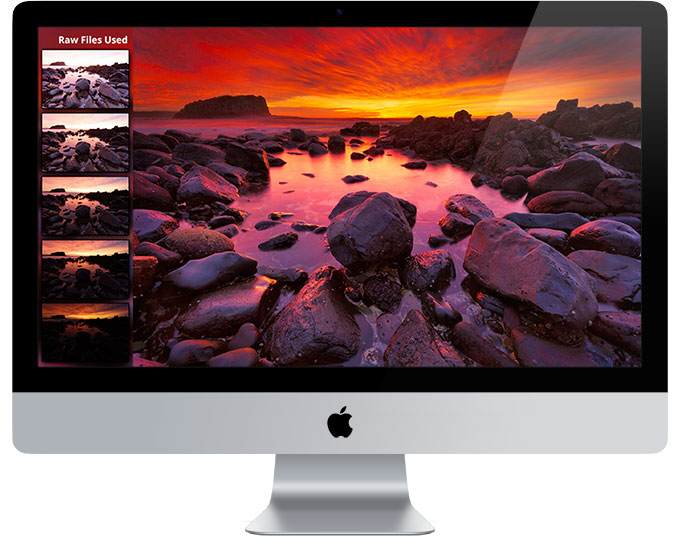
The Luminosity Masking Mastery video course is delivered over three easy-to-follow modules which teach you these advanced Photoshop techniques from the ground up so that you can get a deep understanding of how and why to use them (in modules 1 and 2).
Then in module 3 you get a full real-world walkthrough demonstration so that you can see how to apply everything you've learned.
It’s normally valued at $97, but it’s yours FREE today!
Remember, if you already own this course or any of the other bonuses, get in touch after you purchase and we can arrange an alternative bonus!
FREE Bonus #3: Processing Walkthrough Video Packs 1 & 2
To help you understand how luminosity masking can be used to get amazing results, you’re going to see the start to finish processing of 6 of my own photos.
Each video is between 40 and 60 minutes and shows every step of the process required to edit these images from beginning to end.
Walkthrough Video Pack Volume #1
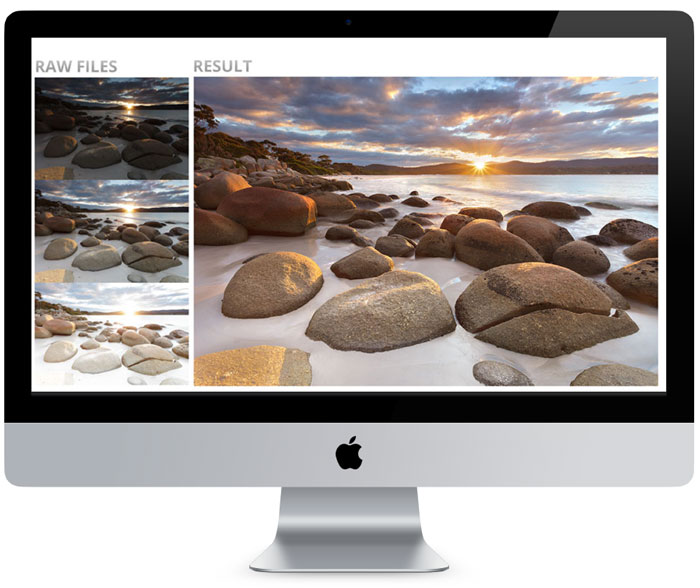
Video 1: Bay of Fires walkthrough
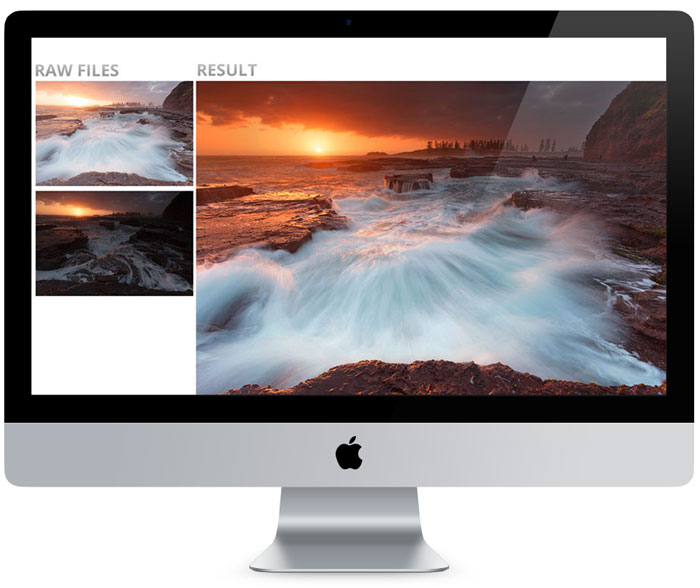
Video 2: Kiama Surge walkthrough
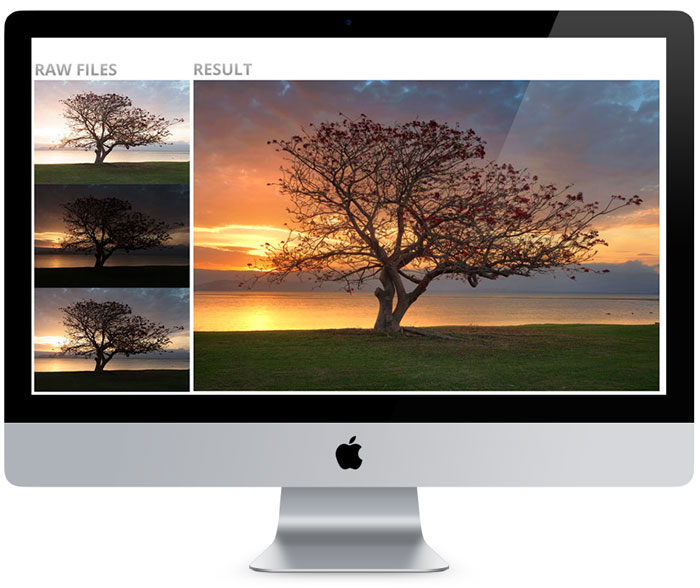
Video 3: Illawarra Tree walkthrough
Walkthrough Video Pack Volume #2
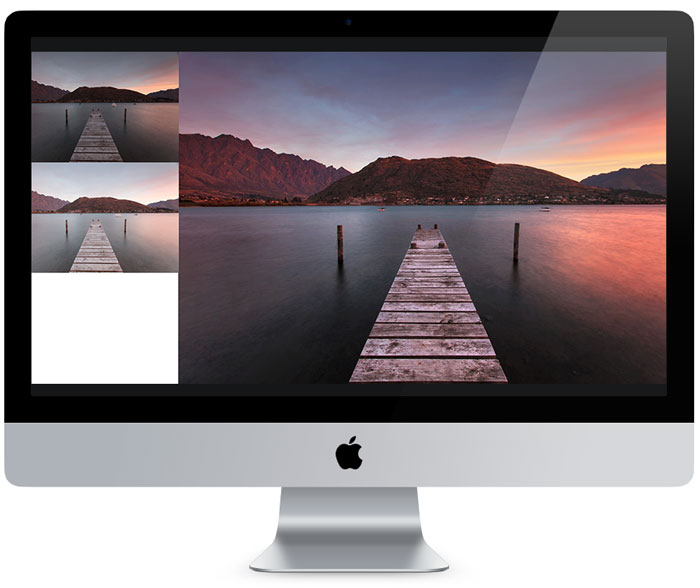
Video 1: Frankton Jetty walkthrough
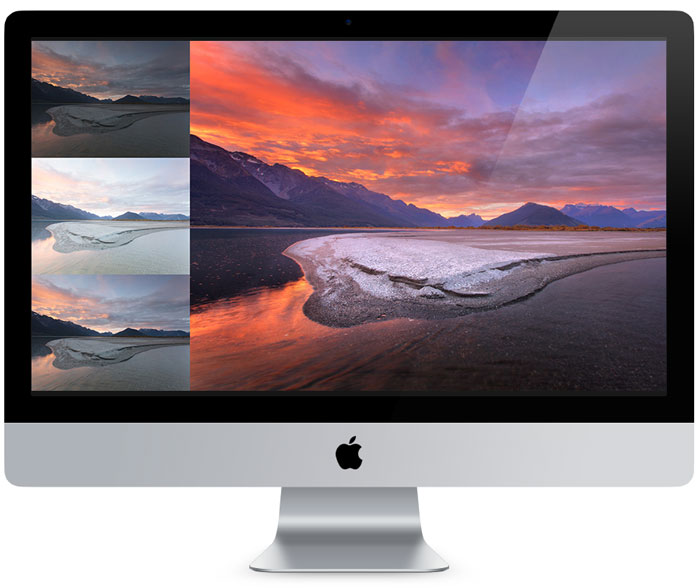
Video 2: Glenorchy Sunset walkthrough
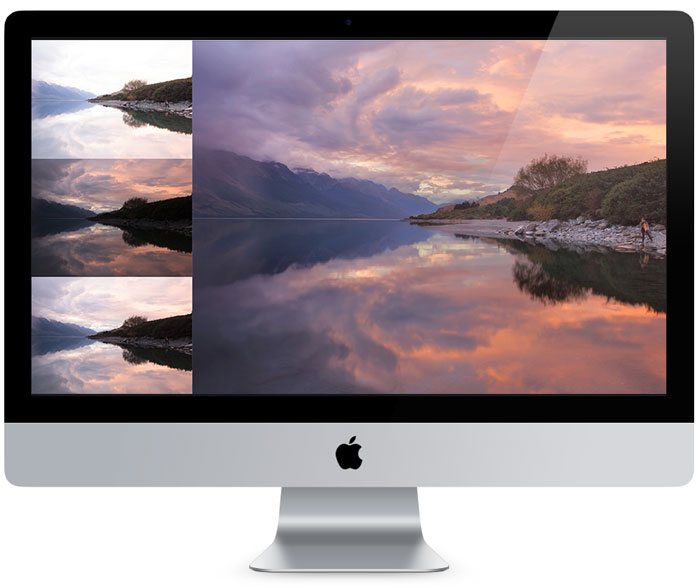
Video 3: Wakatipu Sunset walkthrough
These videos were recorded before I developed the Panel, so they show the full manual way of doing it, but now you have the panel it will help you recognise how much faster the panel makes the whole process!
It’s normally valued at $102, but it’s yours FREE today!
The Luminosity Masking Panel has a retail value of $97
and that’s excluding all of the bonuses!
When you add in all the bonuses,
the entire system is valued at $323!
Yet, that’s not the price I have for you today.
Listen…
You could just walk away now and use the notes you’ve taken today and try to figure the rest out on your own and end up spending hundreds on private instruction, or even thousands of dollars on new gear in the hope of seeing massive improvements in your photography.
Or worse...
You could ultimately end up finding out the road you’re on right now leads only to ultimate confusion and overwhelm, and throwing in the towel all together
This is not what I want for you. And I know it’s not what you want for yourself.
This means, you won’t pay $323
Your total investment today, including:
Your total investment today, including the Luminosity Masking Panel
plus ALL the bonuses, is...
only $323 $67
(Australian Dollars)
And the best part is this:
You’re protected by my own personal 60 day 100% no questions asked money back guarantee. So there’s no way you can lose.

Try it Out 100% Risk-FREE for 60 DAYS!
Here is my promise to you. If you start to use the panel and implement it in your own workflow, and you honestly feel I’ve wasted your time or you weren’t able to find any value, send me an email and I’ll gladly refund you. No questions asked, no hard feelings.
PLUS: Act NOW and get access to this special limited-time bonus worth $47 for FREE
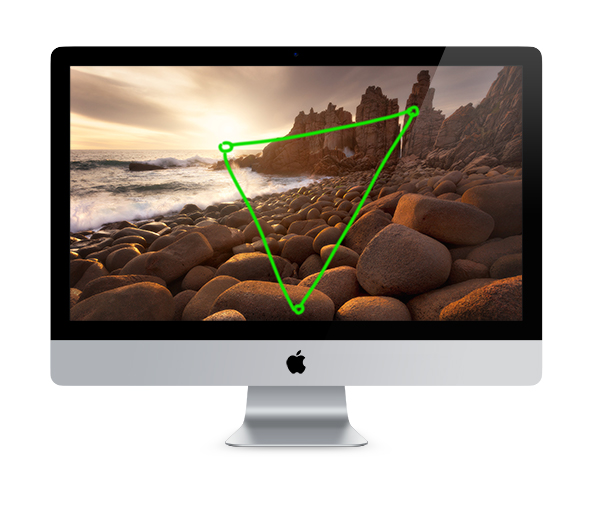
FREE Bonus #4: Landscape Composition 101 course
This is your secret to empowering you to come home with more successfully composed photos from every shoot. This includes:
It’s normally valued at $47, but it’s yours FREE today!
Here's Everything You're Getting:
Luminosity Masking Panel - $97
Photoshop Workflow Fundamentals Video Course - $27
Luminosity Masking Mastery Video Course - $97
Processing Walkthrough Video Packs 1 & 2 - $102
Landscape Composition 101 Video Course - $47
TOTAL VALUE = $370
Remember: You've been struggling to get the results you’ve yearned for, for far too long…
Yet, simply by choosing to take action today and implementing the Luminosity Masking Panel in your workflow, everything will surely change for the better.
How will it feel when you’re producing images that can stand proud next to those from the photographers that YOU look up to, and that draw praise from your friends, family and peers?
You are free, at peace, confident you have what it takes in Photoshop to bring out the full potential of every photo you take from this point forward.
To do all I can to help, I’ve lowered the price of all this for you by 82% ($303), just so you can get in today.
But, eventually, I'm going to have to increase the price back to retail, where it deserves to be.
So you must act now before I have to do that.
Take advantage of this limited-time offer, while you still can...
CLICK the “Add to Cart” button below right now, and let's get you started today!
Your total investment today, including the Luminosity Masking Panel
plus ALL the bonuses, is...
only $370 $67
(Australian Dollars)
FAQ
Here are answers to some frequently asked questions:
What versions of Photoshop does the panel work in?
Do you have a demonstration video so I can see how the panel works?
© 2019 Steve Arnold. All rights Reserved.