"the CREATIVE COLOUR COMPOSITING CLASS is the easiest way to create more WOW factor images than ever before"
So if you would like to:
Then the CREATIVE COLOUR COMPOSITING CLASS is for you!
Here's how it works:
The Creative Colour Compositing Class is a system that you the individual techniques and strategies that you need to create stunning and realistic composite landscapes, but also shows you how you can use those same techniques and principles to breathe life and colour into single-image photos too.
Here's an example of one of the images you'll be creating in the course
Before:
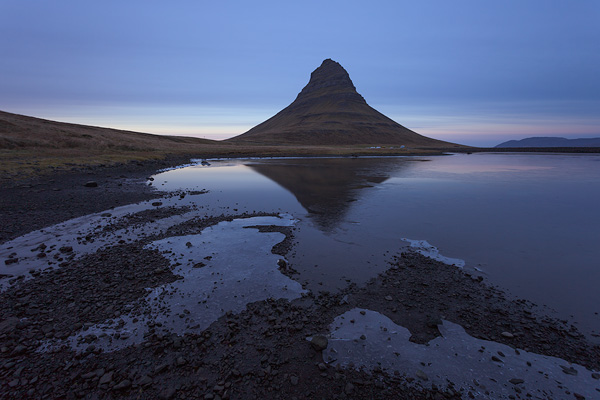
After:
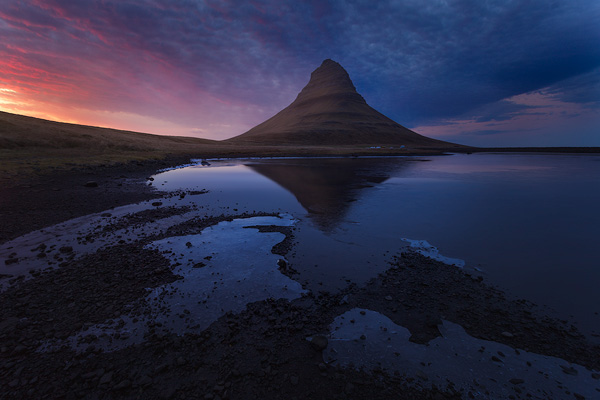
Here's a look at what you're learning in the course:

Chapter #1: The fundamental techniques

Chapter #2: Borrow Colour In Depth Walkthrough #1
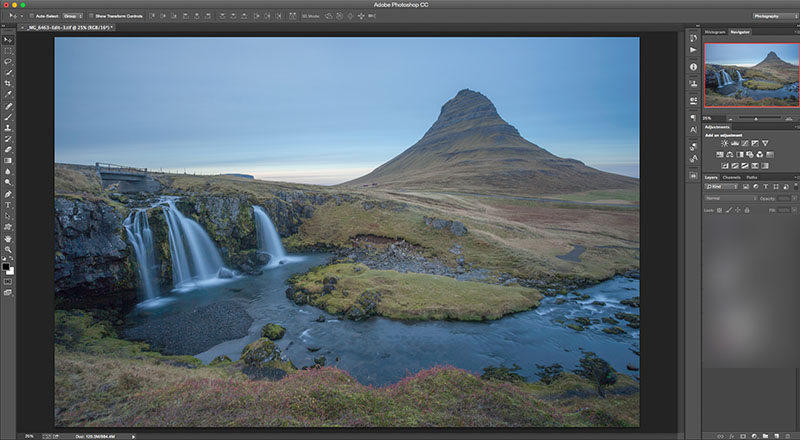
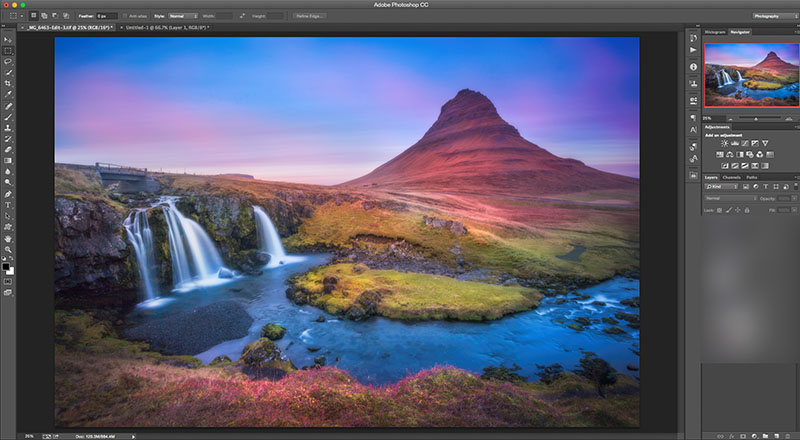
In this first in-depth walkthrough, I use my “borrow colour method” to revitalise this very grey image, by taking the look and feel from another completely different shot that just happened to have some nice soft light and colour, and embedding it into this one before using a number of additional colour and contrast techniques to end up with this vibrant finished image….
Before:
After:

Chapter #3: Borrow Colour In Depth Walkthrough #2
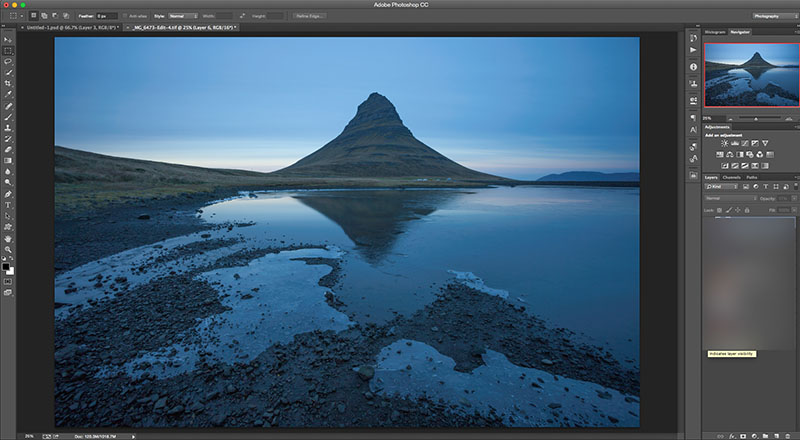
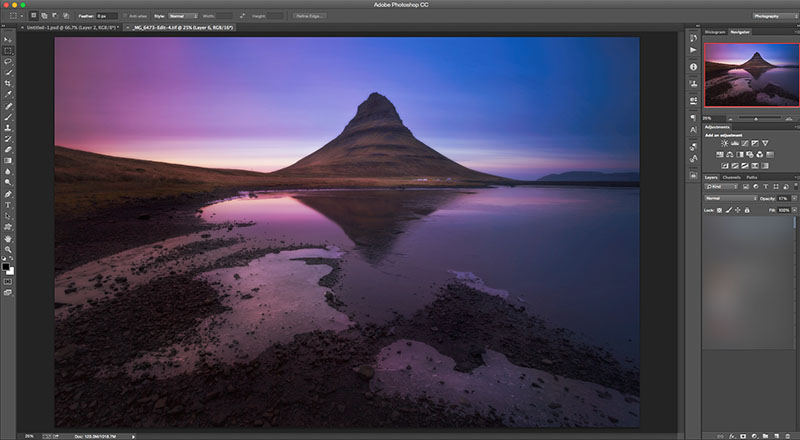
Then in the second walkthrough, we take this next image, which is of the same mountain in Iceland, taken the morning after the shot before…
And using another Colour borrowing method, this time using a different source for the seed colour, we transform it into this finished image, making sure that the colours and light values all work in sync around the entire frame, in the reflections etc.
Before:
After:

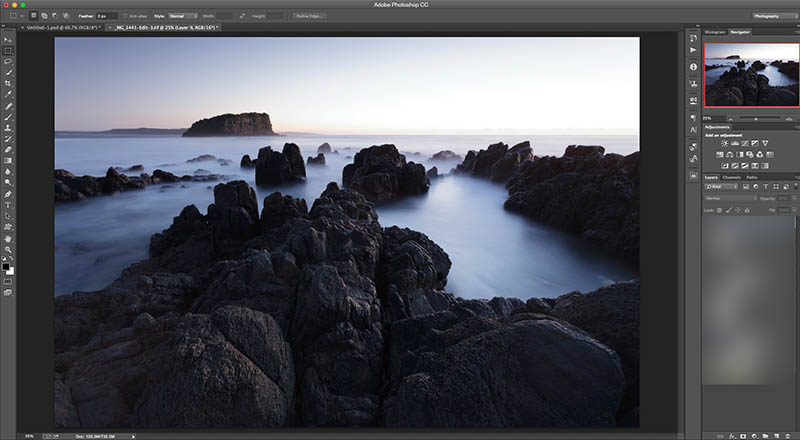
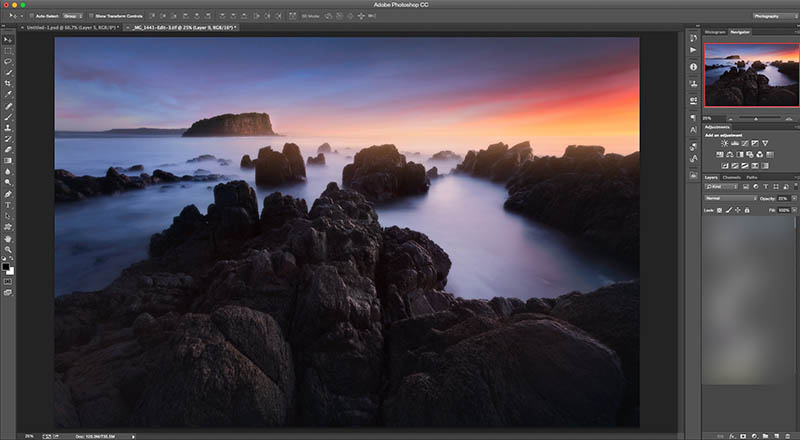
Chapter #4: Sky Replacement & Hazy Light
Here you get to see the exact step by step process I used to import a new sky into this shot and blend it in using some of the key colourisation and hazy light concepts, along with a number of other key workflow techniques to arrive at this finished image.
Before:
After:

Chapter #5: Extreme Sky Replacement
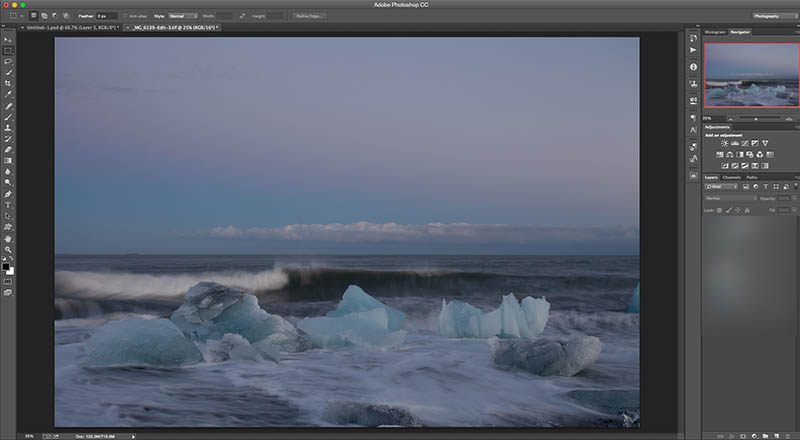
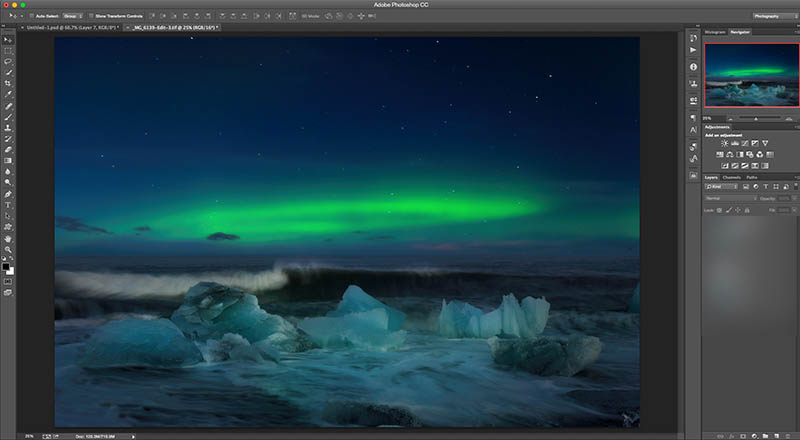
This next walkthrough is a bit more of an extreme example of using the key concepts from these videos, but again it’s yet another eye-opener in terms of the power of what can be achieved when you use the simple techniques I’m showing you in the course.
In this example we take what essentially is a daytime shot, and blend it in with a surreal night time sky and then match the colours and exposure between the two shots to create this, whilst still very surreal image, a realistic looking blend.
Before:
After:

Chapter #6: Sky Replacement & Colour Matching
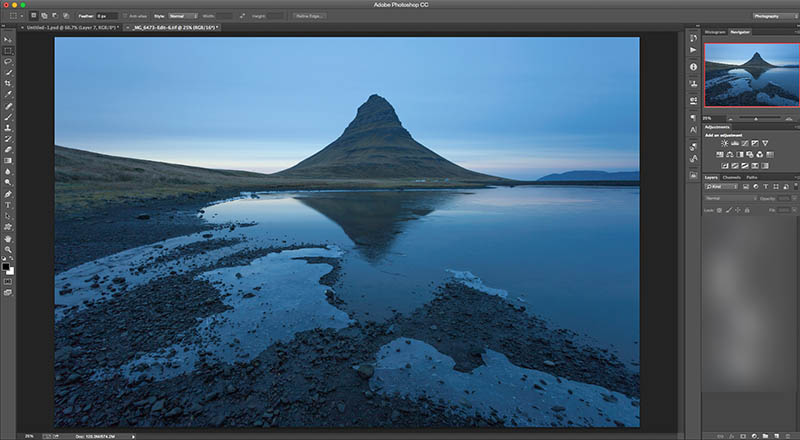
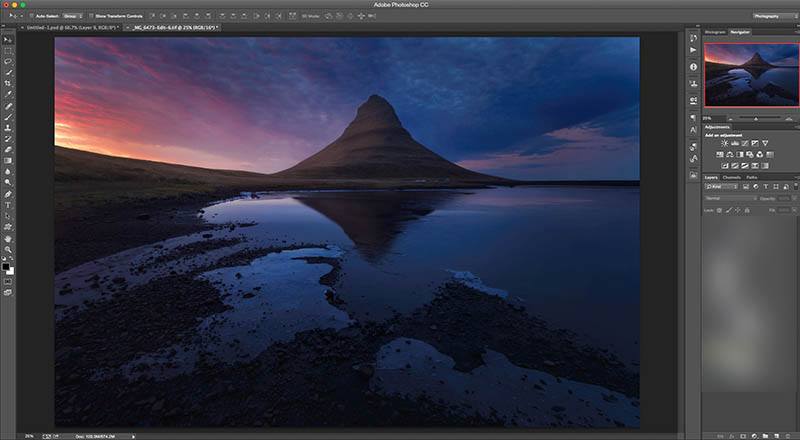
This walkthrough runs through all the steps required to import a sky from a colourful and fiery sunrise or sunset, into a completely dull, flat and colourless scene.
This includes matching colours, reflections, balancing light, fixing halos caused by blending/masking and more.
Before:
After:

Chapter #7: One image - two directions
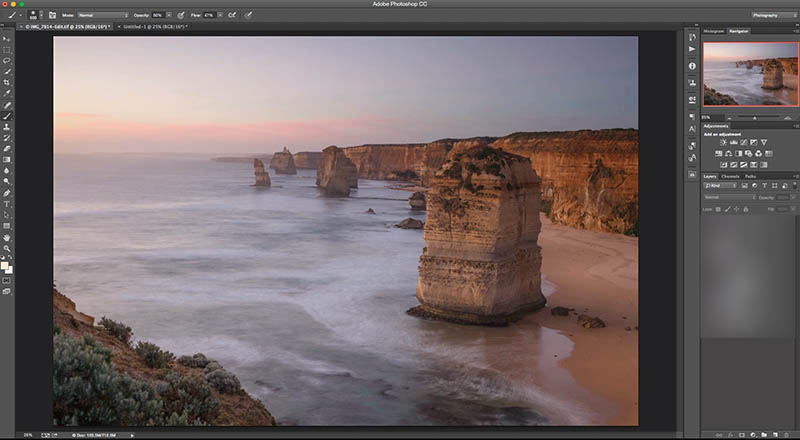
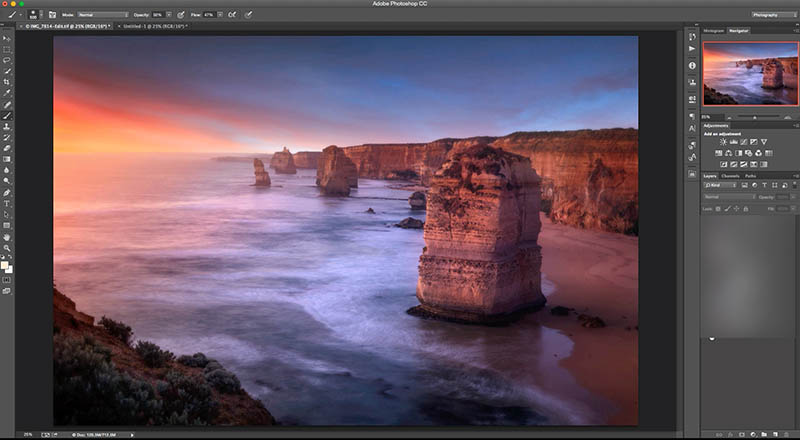
This chapter walks you through two alternative directions for the same source image.
One, using the sky replacement techniques taught earlier in the course, and the other, using the more subtle colour borrowing methods.
Here’s how each one turned out - and again, just a great example of the flexibility and power of what you’re learning throughout these videos.
Before:
After:

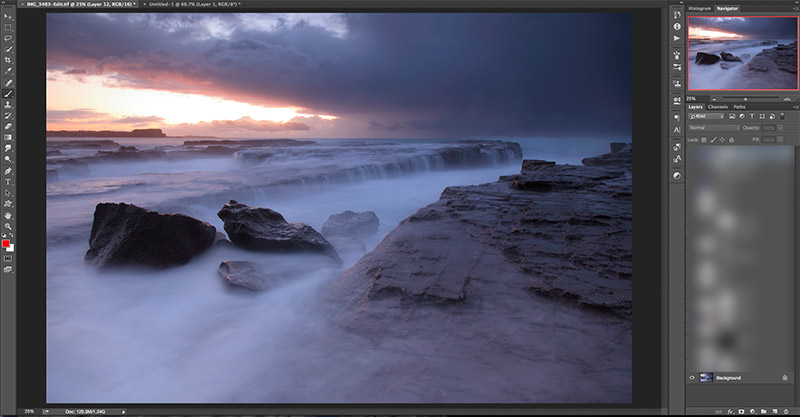
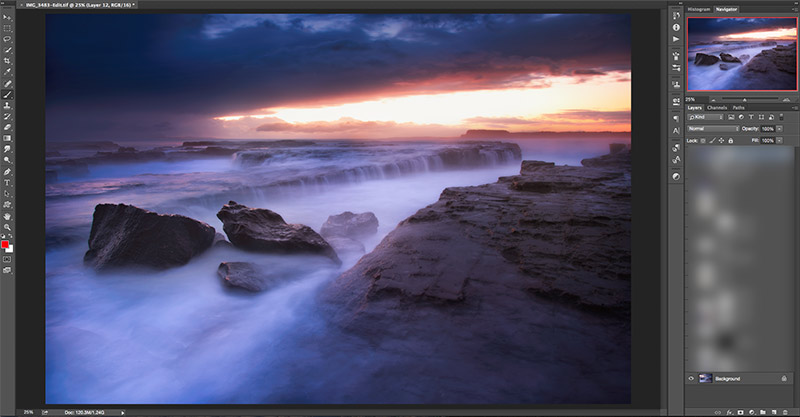
Chapter #8: Creative Composition Manipulation
The next video deals with fixing a different problem to the previous ones, but using the same techniques to do it.
The starting image had a very lop-sided composition with the nice morning light poking through the clouds being stuck all the way over on the left side of the frame.
So in this retrospective walkthrough, I show you all the steps taken to go from this before shot, to this after shot, creating a more balanced composition and effectively "saving" the shot.
Before:
After:

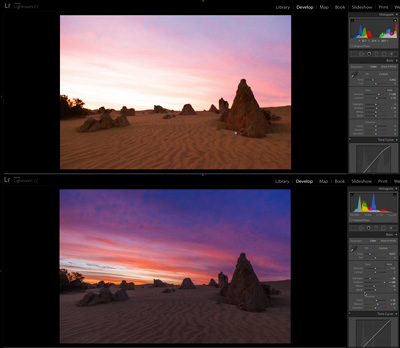
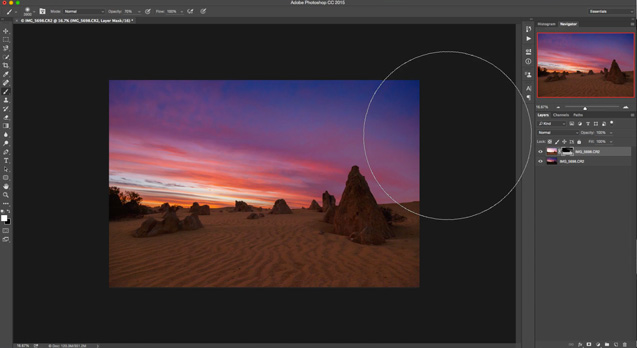
Chapter #9: How (And Why) To Double-Process A Single RAW File
In this video I'm showing you how to double-process a single RAW file in Photoshop or Lightroom and then blend the two versions together again in Photoshop.
This is a technique which is most commonly used for creating "bracketed exposures" from a single RAW file, so that they can be blended together again to create a high dynamic range result.
But what I'm showing you in this video will break wide open the potential for all the other different types of edits you can (and should) consider making to multiple versions of the same file.
Before:
After:

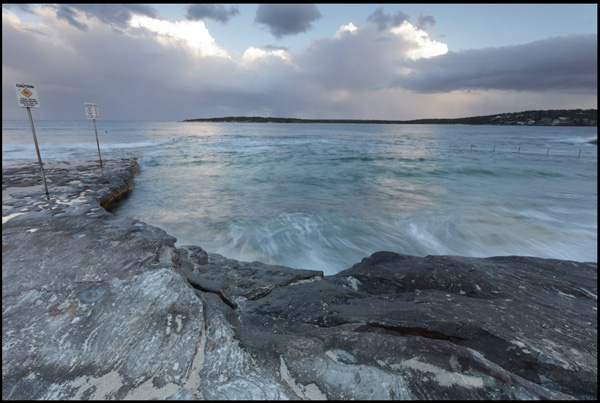
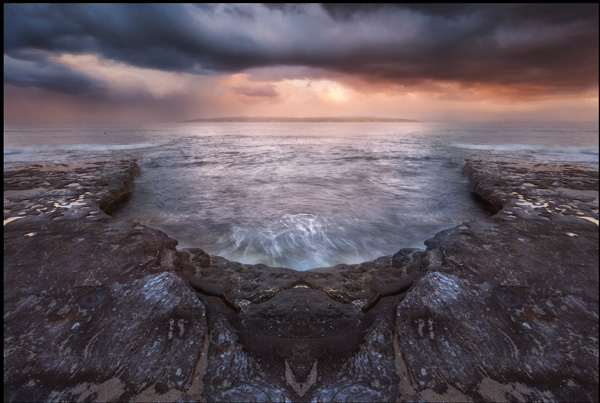
Chapter #10: Creative Mirror Image Composite Walkthrough
It's time to really start busting through those creative boundaries in chapter 10!
In this retrospective walkthrough I'm walking you through every layer and adjustment that I made to turn the before image (below) into the after image (also below).
It started with a simple copy/paste/flip of one half of the frame, then on to using many of the techniques that have been taught in the earlier videos in this course.
Before:
After:

BONUS: RAW File Downloads
As well as having full download access to all of the tutorial videos listed above, you also get to download my original RAW files which I used in the making of these videos.
This will allow you to follow along exactly, step by step, with all of the walkthroughs and instructions. Once you've tried these techniques out using my files and following along with the videos, you'll be in an even better position to use these techniques on your own shots.

60 Day Money-Back Guarantee
Take the skills and techniques you're learning in the Creative Colour Compositing Class and if they haven't totally transformed the way you approach Photoshop within 60 days, just let me know and I'll return your payment, no questions asked!
It's easy to get started...
Simply fill out the order form below and your course access details will be sent to your email inbox within minutes...
100% Satisfaction
Your purchase is risk-free thanks to our 100% satisfaction guarantee.
Secure Payment
Secure, fully encrypted payment, to ensure your data privacy and online safety.
