If you like the idea of being able to swap the sky in a photo and for it actually look good, then today is a good day!
When you follow these three important tips your sky-swapped images will look better than ever.
1) Make an accurate selection
It all starts with an accurate selection. Get this part wrong and it's game over before you begin.
Pay special attention to halos popping up around the bright or dark edges where your sky meets its new foreground.
The refine edge tool is very helpful here, tidying up any halos caused by the selection itself.
2) Match the colour
One of the biggest tell-tale signs of a dodgy sky-swap is when the colours in the sky don't match the colours of the original foreground.
If you're bringing a sky from a colourful sunrise or sunset into a shot taken on a drab and drizzly day, then it will look like a simple cut-and-paste job unless you adjust the foreground colours to match and sometimes literally reflect the colours in the sky.
Depending on the shot, you might be able to do this with some simple colour-shifting via a curves adjustment layer.
But the more dependable and effective way to achieve it is to sample the colours in the sky and then paint them into the foreground (check the link at the end to see exactly how I do this).
3) Match the light
The problems caused by not following tips 1 and 2 are easy to spot .
But number three might be the most important, because it can sneak under the radar.
If you get this bit wrong (or miss it altogether) then the result will be an image that for some reason just seems off, without knowing why…
What I'm talking about it matching the direction and intensity of the light between the new sky and the foreground.
The simplest example I can give is if the sun is on the left of the frame in the sky, and on the right of the frame in the foreground… The shadows will be going in all kinds of different directions!
The easiest fix to this problem is to prevent it happening in the first place by blending two images where the light source is in the same position.
Or if you want you can get to work with the various dodging and burning techniques available in Photoshop to essentially re-light the foreground, painting the light in where it should be according to the new sky.
Enjoy,
Steve
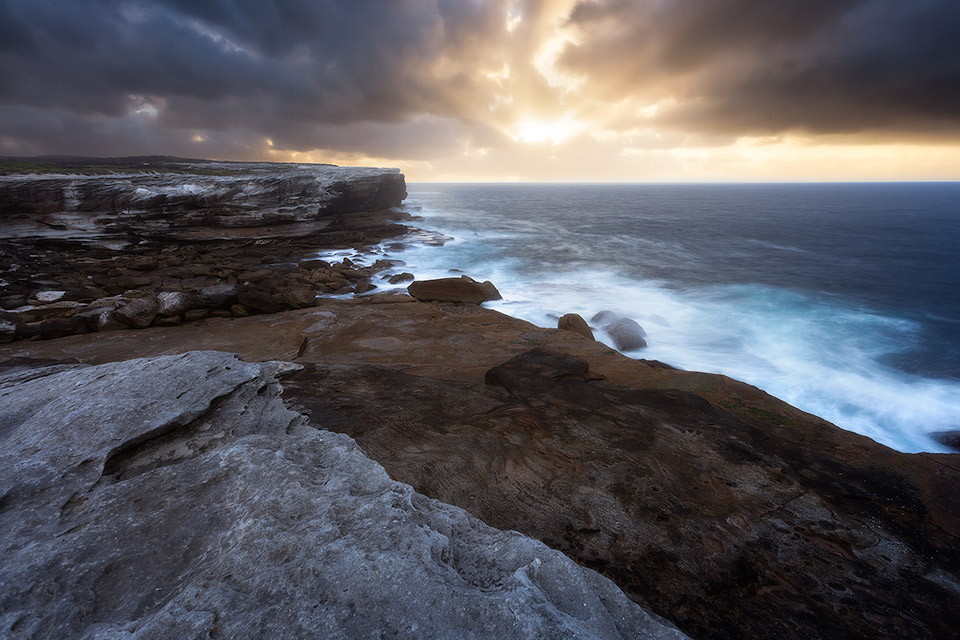
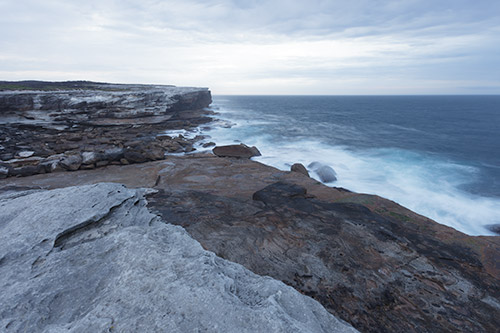
P.S Here’s a “before and after” look at the image at the top:
Before

After
FREE GUIDE: An Introduction To Luminosity Masking

Download the FREE PDF Guide Now so you can instantly see the difference that Luminosity Masking will make to your Landscape photos.
Just enter your FIRST NAME and your PRIMARY EMAIL Address below to subscribe to our emails so we can send you the download link: