“Here's Why You Don't Always Need The Perfect RAW File”
If you feel like you can't produce a great result until you have the perfect RAW file, then take a look at these examples from my own personal back-catalogue of images.
I'm sure you'll agree every one of these has undergone a massive transformation.
And that's thanks to the power of what's possible in Photoshop.
I mean, why shouldn't we use the tools that are available?
These are wonderful times with the technology that we have at our fingertips and I think we should make the most of it.
So to help inspire you to go back and re-visit some of your older shots that you had previously discarded, on this page I'm revealing what some of my own RAW files looked like straight out of camera!
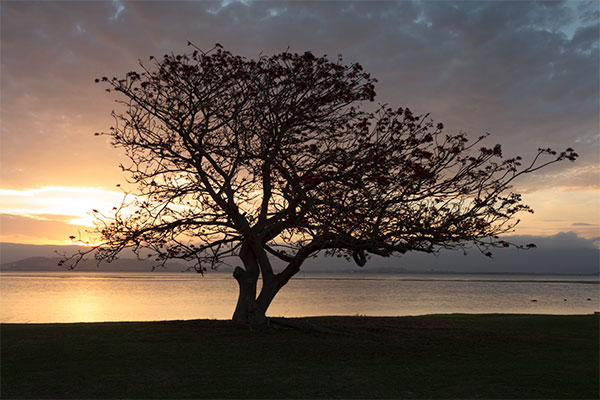
Example #1
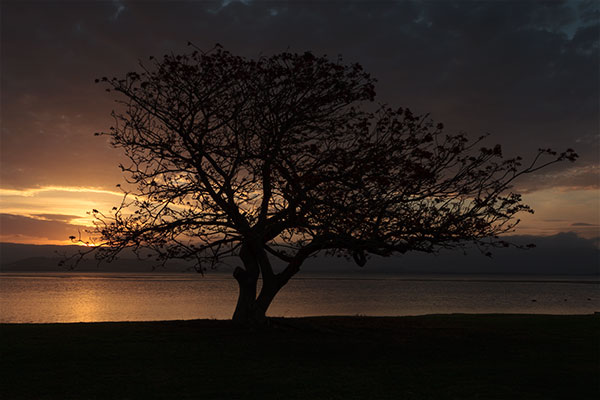
The original RAW file maintains the details in the bright sky, but the rest of the shot is completely underexposed.
Already the sky has blown out, whilst the tree is still almost completely silhouetted.
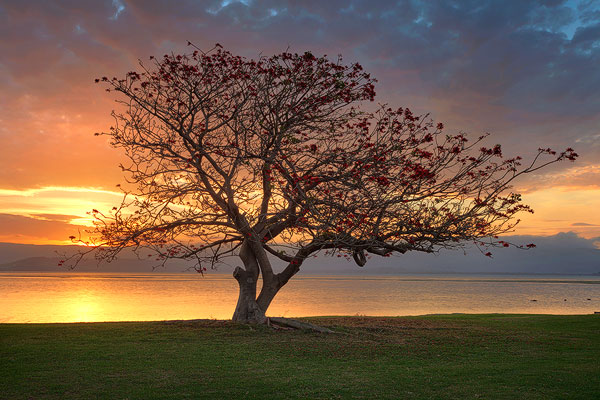
And here's the finished image. The blown-out part of the sky was blended in from the darker exposure, and there was enough detail in the brightest exposure to pull some brightness and detail out of the tree.
This would be impossible to re-create in a single shot in the camera because of the extreme dynamic range of the bright sun and the dark tree.
The movement of the tree's branches in the wind also meant that the two even brighter exposures that I did shoot were useless because the movement made it impossible to blend/overlay them with the two dark exposures.
Example #2
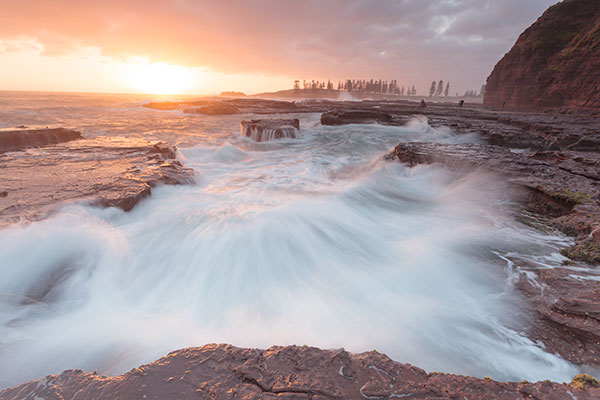
The timing of the wave was crucial to this shot. Unfortunately it meant that the sky overexposed badly and the rest of the shot looks washed-out.

A much shorter exposure was needed to capture the detail and colour in the sky around the sun, but this meant the rest of the shot went to silhouette.

The fact that I could merge the two shots by hand, using the best parts from each exposure meant that I could get the shot I really wanted.
No matter how good I might be with a camera – there was no way on earth I could get a single perfect RAW file of this scene. Photoshop to the rescue! haha!
Example #3
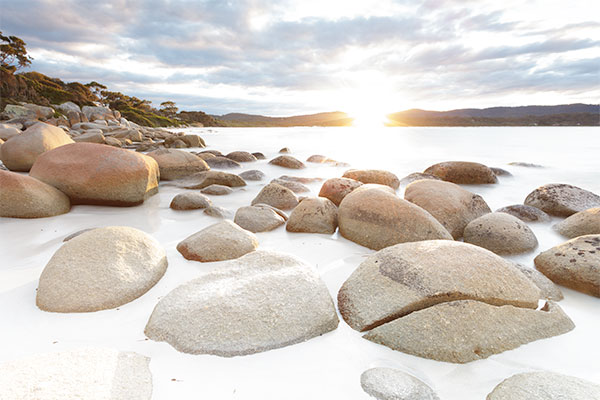
This scene (shooting directly into the sun) absolutely required bracketed exposures. This first one that captures decent detail in the bushes and the rocks causes massive overexposure in the sky. As a result, even though we have the shadow detail captured, the image becomes hazy due to the lens flare.
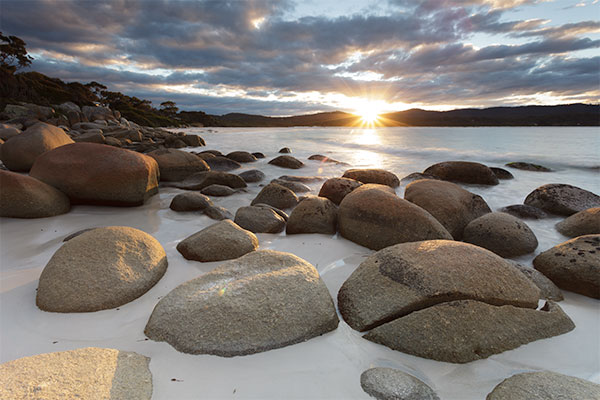
This middle exposure is already losing a lot of shadows whilst the sun is still massively overexposed. There's still a lot of lens flare too.
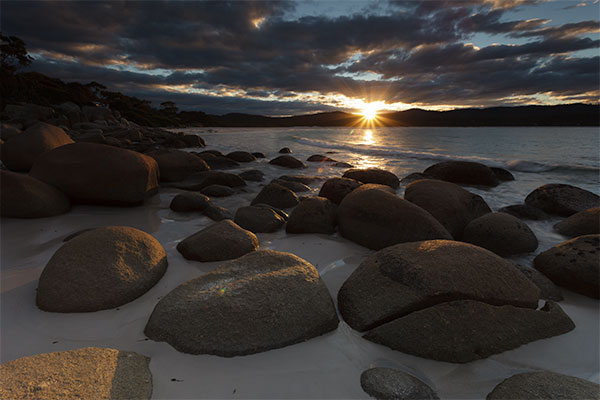
This third exposure reduces the lens flare factor and creates the nice sun-star effect, but it's still a really high-contrast, low detail image.
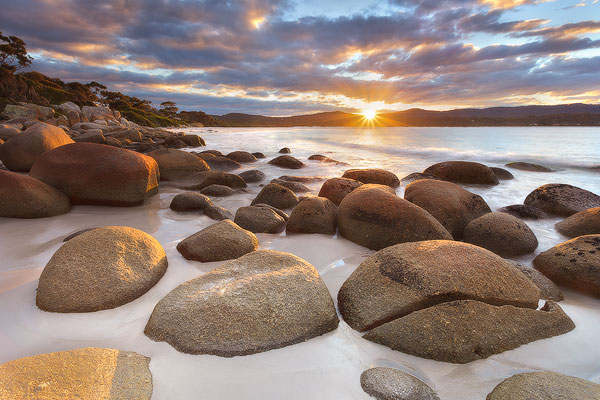
As imperfect as the three exposures were, they still blended beautifully when I ran them through my workflow in Photoshop.
Example #4
This kind of transformation is NOT just restricted to blending exposures, as you saw in the Gibson Steps video the other day. Here's what the side-by-side comparison looks like for that shot.
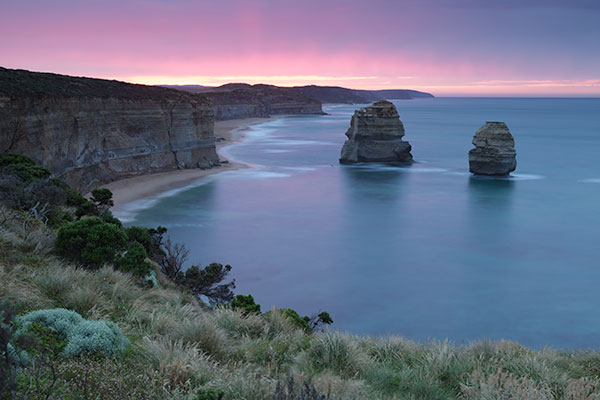
The horizon is on the verge of being overexposed, the colour balance seems WAY off due to the surreal sunrise colours and the whole thing just looks altogether flat…
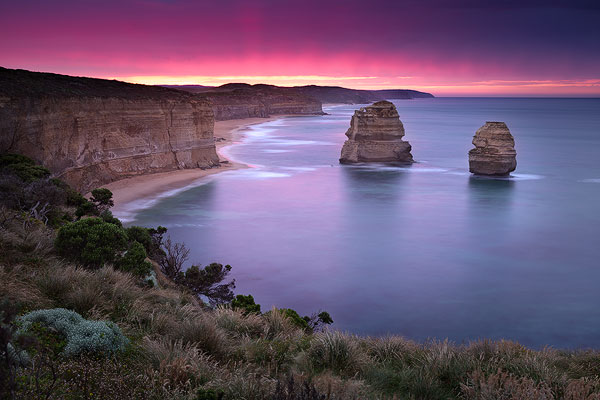
But using the techniques I showed you the other day on the walkthrough, I was able to transform it into a shot with a lot more “punch!”
Whether or not you're a fan of the creative styling of this Gibson Steps shot, you can't argue that it's a vast improvement on the original RAW file 🙂
Remember
You only have a few days left to grab the special offer I put together for you that gives you free access to the downloadable version of the Gibson Steps video (so you can play, pause, rewind it to really study the techniques up-close).
Click the button below to go to the next page and find out how to claim your free download: