I wrote a couple of days ago about pointing the “wrong way” and still getting the shot…
Because when you face away from a sunset, that’s when you get to capture those really nice soft pastel colours in the sky.
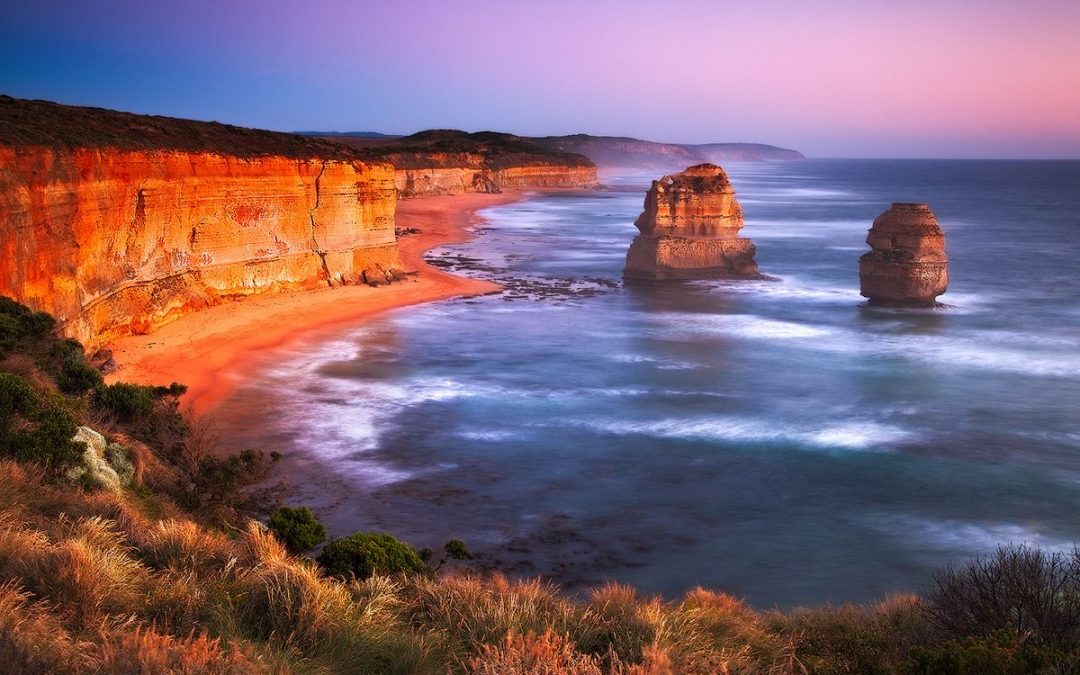
For this particular shot, there was no question about which direction I’d be pointing, since these big rocks in the ocean were one of the main reasons I drove nearly 1000 miles each way on this particular journey. (Not as extreme as it sounds since we made a 2-week trip out of getting there and back).
And even though the skies were totally clear this particular sunset (not how I usually like my skies), this has turned out to be one of my favourite ever photos I’ve taken.
There’s just something about that soft glow across the landscape that really grips me.
An interesting little side fact about this spot…
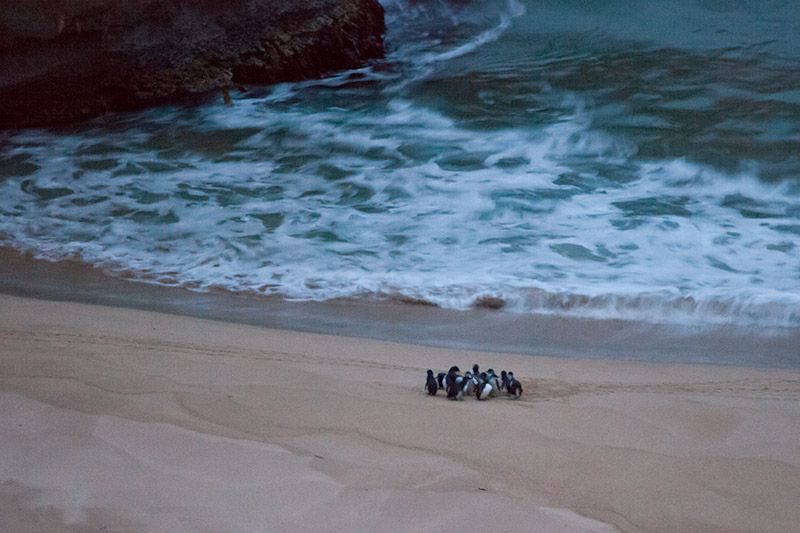
If you wait around until dusk just as it’s getting a bit too dark to see, then just behind where I’m standing to take this shot you can look down at the beach to see hundreds of little penguins all coming to shore for the night (literally, they’re called “little penguins”).
It’s quite difficult to see them because you’re so high up and they’re so far down (and small, at just over a foot tall they’re the worlds smallest penguin).
But it’s still so sweet to see them waddling up the beach leaving their little footprints in the sand.
Actually, last time I mentioned cute little Aussie animals (the Pademelons) I had a bunch of replies asking why I didn’t include a photo of them! So here’s a really badly shot (hand-held in the dark) photo of some of these penguins I took the next day at a spot a little further down the coast:
But anyway, back to the photo at the top…
Just like with the “wrong way” sunset image I shared earlier, this one was just one exposure making it more convenient to process in Photoshop.
But the RAW file did start out really dull and “muddy”, so I still had a lot of work to do in Photoshop to bring it back to how I remember seeing it (or feeling it) at the time.
Something I always have to keep reminding myself (even when I know it) is to not be disappointed when you first view your RAW files after loading them on the computer.
For a start, they’ll always appear duller than the images on the back of your camera because your camera shows you a processed JPEG preview (dependant on the “Scene Mode” you select in your camera settings… you know, Landscape, Vivid etc).
But beyond that, your RAW file is basically a digital negative. The ONLY way to make it look even close to the actual scene you photographed is to process it.
Sometimes if it’s been a while between taking a photo and viewing the RAW file on the computer, I forget how it looked and with only the RAW file as a reference it’s easy to write it off and not even bother processing it (I talked about this recently too).
But it’s always ALWAYS worth a shot – to run some quick basic adjustments in Photoshop, if not only to prove to yourself that there is greatness waiting to be uncovered in that image.
If you’ve seen any of my workflow videos at all (free or paid), then you’ll have seen the Levels contrast adjustment that I use to pull colour, contrast and detail out of images…
This is my go-to technique for seeing how much potential a RAW file might have. It only takes a few seconds to throw a shot into photoshop and add a couple of levels adjustment layers and adjust the control points up and down a bit to see what happens.
Then if it looks like it’s having a nice effect, I’ll know it's worth going back to the start and running through my full workflow.
Which is exactly what I did the first time I processed this shot, basically using the exact workflow (except for the exposure blending parts) that I teach in my Luminosity Masking Mastery video course.
To see more about that, click here.
See you on the inside,
Steve
FREE GUIDE: An Introduction To Luminosity Masking

Download the FREE PDF Guide Now so you can instantly see the difference that Luminosity Masking will make to your Landscape photos.
Just enter your FIRST NAME and your PRIMARY EMAIL Address below to subscribe to our emails so we can send you the download link: